Thursday, 29 October 2009

Aint no Mountain High Enough


Messing about with Proportional editing and various types of Peaks - Quite pleased how this turned out though it horribly reminds me of the version of the moon seen in Wallace and Gromit: A Grand Day Out

(Yes this was totally an excuse to post a Wallace and Gromit picture - though maybe I'ld like to try making a model version of this scene in the near future....)

Sunday, 4 October 2009

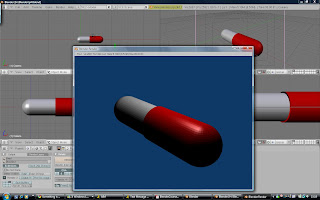
Blender Basics 2: The Pill

So here's the next tutorial parts, today playing with editing tools on meshes.

For this tutorial we are making a nice simple (and easy to swallow) pill


For this I made a sphere and chopped it in half in editing mode (A to deselect B to box select and X to delete) via selection then extruded it (E) and closed the other side (Shift + F) before duplicating (shift + D) and rotating (R) to make the other half, using scale (S) to make it a little bigger and the materials tab (F5) to create simple colour textures. I then used smoothing to make the Pill look more smooth and rounded.


Fairly easy tutorial again, still taking in the various commands that make up Blender but I'm catching on fairly well! I also played around with the rendering tools - in particular the anti-aliasing (known as Oversampling or OSA for short in Blender).

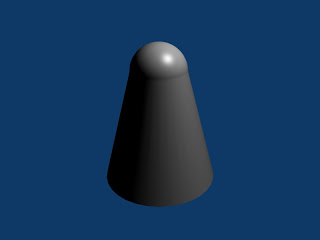
I also attempted the challenge in creating the Salt Cellar. Simple
enough, same deal as creating first half of the pill but deleting bottom half of sphere rather than side and using scale to make the extrude slide outwards


Sunday, 27 September 2009

Blender Basics 1

While I have used Blender before it has been a while (Back in the days of version 2.3 I believe). Back then I only had a computer powerful enough to do the simplest Tutorials ( anything more complicated slowed the system to a crawl or crashed it) so coming back to these tutorials is familiar territory!

Alas I forgot initially that Blender has an interface that relies a lot more on keyboard shortcuts, a callback to how 3D software used to look up till a few years ago. Compared with the newer Maya interface it can look a bit daunting. Though once you note the keys down its certainly easier to use than Maya in some cases still.


Initially I forgot Blender doesn't actually default to front view so I initially modelled the house on it's side! I Redid it after that little faux pas

With objects it's important to use Ctrl when moving to make shapes match I find, also Ctrl-Z undoes any mistakes (and pressing escape when editing an object cancels the action). Good shortcuts to know in case something goes wrong ( shame Blenders undo function isn't exactly clearly marked out anywhere)

The castle came together much easier, I duplicated the square to a 3x3 size, added 4 towers and made one roof and duplicated the other 3. I also added 3 lamps to improve the lighting in the render as well as moving the camera.

Incidentally F3 saves a JPEG shot of the render which the tutorial doesn't mention. Neat eh?

So far so good, now to move onto the next tutorials!

Monday, 21 September 2009

Just Initial introduction - what I've done previous

I'm Rebecca, I'm a bit of a cartoon fan, hopeful potential animator and general artist.

3D I'm not really big on at the moment: I have dabbled in the past and over the summer I have been trying to work on Maya. Thought I'ld post previous experience before starting on the tutorials. As I may also add posts on Maya as I go along to chart my progress. (Maya is needed for Matchmoving this term also)


First tutorial for Maya: This was rather as I had done this sort of inital design in Blender once before.


Second Tutorial on Maya's documentation is much more tricky. I understand how to work with polygons but stuck at a roadblock currently because the edges between the head and mouth-piece wont bridge.Has admittedly been a bit of a de-motivator for progress with Maya.

The Blender tutorials seem to be at a slightly lower level: looking forward to them!