Tuesday, 18 May 2010
This animation uses lattice deformation on the rectangle and simple rotation keyframes on the cylinders. It looked hard to do at first but once I understood the way the lattice deformation worked it became quite easy. The only thing is I animated the cylinders in the wrong direction...
I got the hang of particles pretty quickly. The only problem with this one was the age of Neil Hirsigs tutorial on particles, parenting an object to another object does not make the parent the emitter for some reason due to my copy of Blender being a more recent version.
Tuesday, 9 March 2010
I've had these sitting about for a week, its not that I dont love you blog its just I've been busy ;___;
Anyways getting back on course, I followed the tutorials for keyframes and timelines in Blender. It doesnt seem too hard to get to grips with so far. The main thing is remembering to keyframe after moving an object
This is another play around with the keyframe tool, this time with jumping shapes that squash and stretch to give a feeling of weight to the objects
Tuesday, 10 November 2009
Glow

Bit of a late night breakthrough - figured seeing as the assignment is a bar, a common thing in bars is light objects of glowing objects to add to design of bar and also shed a little light to darkened surroundings. But...how do you make objects glow in Blender?
Thankfully someone else had the same idea and made a lovely easy to follow tutorial. Be warned however, this particular model takes a bit of rendering time, but the finished product looks lovely~
Materials
 A bit of UV mapping using a tutorial : [link here]
I made an Icosphere and then selected the middle and made a split (Ctrl-E -> Mark Seam) then went into UV/Image Editor and loaded the earth image. I then unwrapped (select all - U key) the mesh and scaled and resized it so it fit the image. Then I made a material and selected texmap to make the mapped image render. To finish off I smoothed the sphere and subsurfed then added stars on the world option
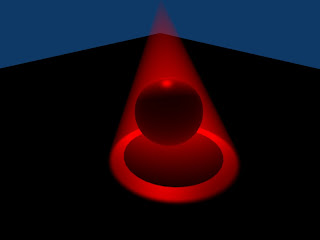 Going back to something simpler - I made a plane to make a floor then a sphere slightly suspended and put a spotlight in with a halo with a red coloured light
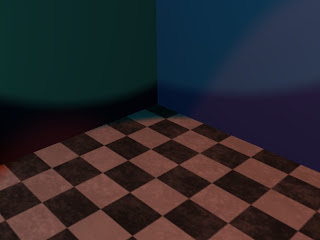 I made a room with planes then seeked out a checker board texture. Once that was applied I then added various spotlights in different colours and positioned them in various areas
 Lastly some material experiment - including wireframe, alpha (transparency), light reflection and texture presets.
Going back to something simpler - I made a plane to make a floor then a sphere slightly suspended and put a spotlight in with a halo with a red coloured light I made a room with planes then seeked out a checker board texture. Once that was applied I then added various spotlights in different colours and positioned them in various areas
 Lastly some material experiment - including wireframe, alpha (transparency), light reflection and texture presets.
Thursday, 5 November 2009
BONUS STAGE
Bit overdue this particular update - should of been done a bit sooner but I'll catch up soon I swear! (I am a perfectionist and I wont say anything is finished unless I think its good enough - a blessing and a curse in many ways!).
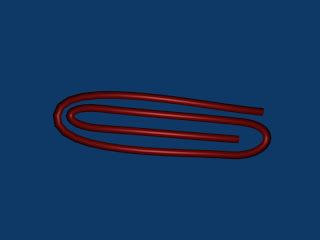
These renders are brought to you today by the Bezier Curve Tool and the Extrude option. Bevel Object also helped
Oh Hello Kitty
 Using what I've learned so far I made a model of Hello Kitty. It turned out pretty good but my skills still need work.
 I used UV and Ico Spheres and Proportional editing. I used simple colours but should get around to learning how to use materials sometime this week (as it didnt go so well with the banana this week
Thursday, 29 October 2009
Fruit Candy
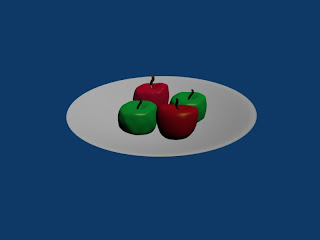
Been playing with Icospheres to make apples. I made the apple then gave it dips and bumps before subdividing and subsurfing. I then made the stalk of the apple using a beizer curve and extrude. I edited each apple to make them look unique
For the plate I made a cube, deleted most of it then made extra vertices in a line, I then span that line in repeat 360 steps to make a full plate. Using the special double removal option to clean up, I then extruded the plate up to give it some depth
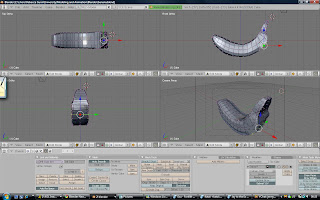 The banana was created separate to avoid risk of effecting the apples or plate, I used a background image for reference and started with a box to practice Box-Modelling. I extruded and shaped the segments till it the entire shape was made, I then smoothed and subsurfed it and scaled it using Y-axis
I had a problem with the texture, I wanted it to map to an image but this simply wasn't happening, may try again sometime once I have better knowledge of textures so I used just part of a banana for texture.
It makes the banana look more like candy than a real banana but at least it looks like something! I then opened the fruitbowl file and used append to move the banana into the file (for future note - for appending, import the Object not the Mesh!)

Subscribe to:
Posts (Atom)
