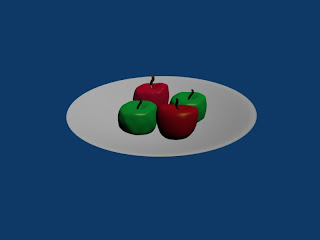
Been playing with Icospheres to make apples. I made the apple then gave it dips and bumps before subdividing and subsurfing. I then made the stalk of the apple using a beizer curve and extrude. I edited each apple to make them look unique
For the plate I made a cube, deleted most of it then made extra vertices in a line, I then span that line in repeat 360 steps to make a full plate. Using the special double removal option to clean up, I then extruded the plate up to give it some depth
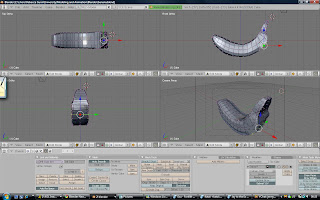 The banana was created separate to avoid risk of effecting the apples or plate, I used a background image for reference and started with a box to practice Box-Modelling. I extruded and shaped the segments till it the entire shape was made, I then smoothed and subsurfed it and scaled it using Y-axis
I had a problem with the texture, I wanted it to map to an image but this simply wasn't happening, may try again sometime once I have better knowledge of textures so I used just part of a banana for texture.
It makes the banana look more like candy than a real banana but at least it looks like something! I then opened the fruitbowl file and used append to move the banana into the file (for future note - for appending, import the Object not the Mesh!)